How to Use a Cold Press Juicer: The Complete Beginner’s Guide
So your cold press juicer has arrived. The box is open, the parts are on the counter, and you are staring at it wondering where to begin. If this sounds familiar, you are in the right place.
This is a complete beginner’s guide on how to use a cold press juicer from setting it up for the first time to building a daily juicing routine that actually sticks. No complicated instructions, no technical jargon. Just a simple, step-by-step cold press juicer guide that gets you from unboxing to your first glass in under 15 minutes.
Understand How a Cold Press Juicer Works
Before you start juicing, it helps to understand what your cold press juice machine is actually doing and why it works differently from a regular juicer.
A cold press juicer uses a slow-rotating auger that operates at around 40 to 43 RPM. This auger gently crushes and squeezes produce against a fine mesh screen, extracting juice without generating heat. This is the core of every slow juicer – no heat means no damage to the vitamins and enzymes in your fruits and vegetables. The process happens in three stages:
- Squeeze: the auger slowly presses produce and pushes out juice naturally
- Filter: the juice passes through a fine mesh that separates it from pulp and fibrous particles
- Blend: the extracted juice is mixed evenly for a consistent and smooth texture
The result is juice that is nutritionally complete, low in foam, and stays fresh in the refrigerator for up to 72 hours. Once you understand this, every step of using the machine makes complete sense.
Step 1 – Unboxing and Getting Familiar With the Parts
When you first open your cold press juicer at home, you will find several detachable parts. While every model is slightly different, most cold press juicers come with these standard parts:
- Main motor body – the base unit that powers everything
- Juicing bowl – where the auger and strainer sit during juicing
- Auger – the slow-rotating screw that crushes produce
- Strainer or mesh screen – filters juice from pulp
- Hopper – the wide inlet where you feed fruits and vegetables
- Juice jug and pulp container – collect the output
- Cleaning brush – for post-juice rinse
Before your first use, wash all detachable parts with warm water and mild soap. Rinse thoroughly because Hurom Juicers are so easy to clean. This removes any manufacturing residue and ensures your first glass is completely clean.
Step 2 – Assembling Your Cold Press Juicer
Assembly takes under two minutes once you have done it a couple of times. Here is the correct order for cold press juicers:
- Place the juicing bowl securely onto the motor body
- Insert the auger into the bowl – it should sit snugly at the centre
- Place the strainer around the auger inside the bowl
- Lock the hopper on top of the bowl
- Position the juice jug under the spout and the pulp container at the pulp outlet
- Ensure all parts are locked into place before switching on most machines have a safety mechanism that prevents the motor from running if parts are not properly assembled
If you are using a Hurom cold press juicer, the safety lock system ensures the slow juicer machine only activates when everything is correctly in place which is especially useful for first-time users.
Step 3 – Preparing Your Produce
This is where most beginners make their first mistake; over-cutting. You do not need to chop everything into tiny pieces.
Here is a simple cold press juicer guide for Indian produce preparation:
- Soft fruits (oranges, pomegranate, mango) – peel and cut into quarters
- Hard vegetables (beetroot, carrots) – cut into finger-length pieces
- Leafy greens (spinach, methi, wheatgrass- the toughest ingredient to juice) – fold into loose bundles and feed slowly
- Amla – remove seeds and feed whole or halved
- Ginger and turmeric – feed small pieces as they are, no peeling needed
The wider the hopper inlet on your machine, the less cutting you need. Models with 120mm Hurom E30ST to 155mm Hurom H400 inlets can take most Indian produce with minimal prep.
One important tip for Indian kitchens – alternate hard and soft produce while feeding. This prevents clogging and improves extraction efficiency. Feed a piece of carrot, then a piece of orange, then some ginger. This rhythm keeps the auger working smoothly throughout.
Once you are comfortable with daily juicing, your cold press juicer can also make fresh nut milk, smoothies, and sorbets – simply by switching the strainer.
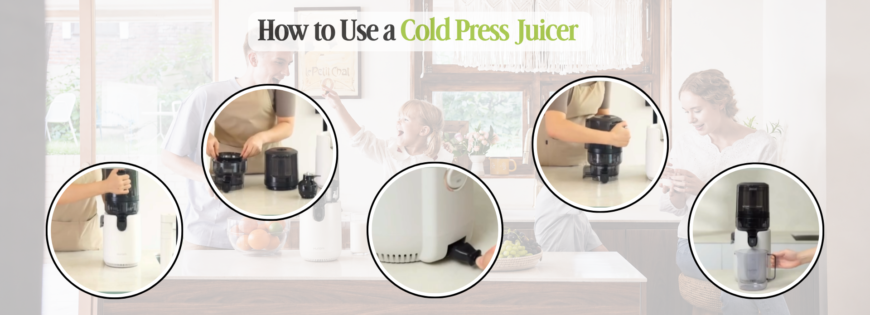
Step 4 – Making Your First Juice
Once your produce is ready and your cold press juicer machine is assembled, here is how to juice:
- Switch the machine to the forward rotation setting
- Feed produce slowly through the hopper – do not push or force ingredients
- Let the auger pull the produce in at its own pace
- Continue feeding until all produce is processed
- Once done, switch to reverse for 3 to 5 seconds – this dislodges any remaining produce stuck in the auger
- Switch off, remove the juice jug, and your first glass is ready
For your very first juice as a beginner, try this simple Indian starter recipe:
Beginner Morning Juice
- 2 medium carrots
- 1 green apple
- 1 small piece of ginger
- Half a lemon (peeled)
This combination is easy to process, gentle on the digestive system, and delivers a naturally sweet, refreshing result that is a good introduction to what fresh cold press juice actually tastes and feels like.
Also Read: Easy Cold Pressed Juice Recipes for Beginners
Step 5 – Cleaning After Every Use
Cleaning is the step that most people frustrate but with a Hurom cold press juicer, it is genuinely quick if you do it immediately after juicing.
Here is the correct cleaning routine:
- Rinse all detachable parts under running water immediately after use – do not let pulp dry on the parts
- Use the cleaning brush provided to gently scrub the strainer mesh – this is where pulp tends to collect
- Wash the juicing bowl, auger, hopper, and containers with mild soap and warm water
- Rinse thoroughly and air dry before reassembling or storing
- Wipe the motor body with a damp cloth – never submerge it in water
The entire cleaning process takes 3 to 5 minutes if done right after juicing. If you wait, dried pulp sticks to the mesh and makes cleaning harder. Immediate rinsing is the single most important cleaning habit to build.
Step 6 – Storing Your Cold Press Juice
One of the biggest advantages of a cold press juicer is that the juice it produces stays fresh significantly longer than centrifugal juice. Here is how to store it correctly:
- Use airtight glass bottles because glass preserves flavour and nutrition better than plastic
- Fill the bottle to the top to minimise air contact inside
- Store in the coldest part of your refrigerator usually the back shelf
- Consume within 48 to 72 hours for best nutritional value
- Always shake or stir before drinking as natural separation occurs over time
Storing juice properly means you can batch prepare – make two or three days of juice in one session, saving significant time on busy mornings.
Also Read: The Right Way to Store Your Fresh Juice
Building a Daily Juicing Routine in India
The real value of a cold press juicer comes from consistency like; one glass every morning, made fresh from real ingredients. Here is a practical daily routine that works for Indian households:
- Night before – wash and prep your produce, store in the refrigerator
- Morning – assemble the juicer (2 minutes), juice (5 minutes), clean (3 minutes)
- Total time – under 10 minutes from start to finish
Start with 2 to 3 ingredients and build from there. Once the habit is established, experiment with Indian classics – ABC juice (apple, beetroot, carrot), amla and ginger, wheatgrass with coconut water, or turmeric with orange and black pepper.
For recipe ideas and further slow juicer tutorials, visit the Hurom Recipes which has step-by-step guides for every healthy recipe.
Common Beginner Mistakes to Avoid
- Feeding too fast – slow and steady gets better yield and prevents jamming
- Not alternating produce – always mix hard and soft ingredients
- Skipping the reverse cycle – always run reverse for a few seconds before switching off
- Delaying cleaning – rinse immediately, every time
- Starting with too many ingredients – keep it simple for the first week
Ready to Start Your Cold Press Juicing Journey?
The first glass is always the most exciting one. Once you taste the difference that cold press extraction makes, the clarity, the freshness, the real nutrition – there is no going back to anything else.
If you are still looking for the right slow juicing machine to start with, explore Hurom’s complete range of cold press juicers from the compact and beginner-friendly E30-ST at ₹17,999 to the fully automated H400 at ₹40,999. Every model is built on the same Slow Squeeze Technology, backed by a 10 to 15-year motor warranty, and designed specifically for daily Indian kitchen use.